Monday, January 31, 2011

New Version Instant Messanger trillian astra 4.2.0.24


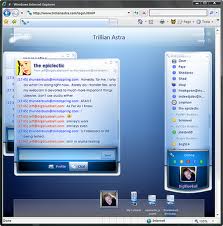
Chat with your friends with Trillian Astra new version 4.2.0.24 is a fully featured, stand-alone, skinnable chat client that supports AIM, ICQ, MSN, Yahoo Messenger, and IRC. It provides capabilities not possible with original network clients, while supporting standard features such as audio chat, file transfers, group chats, chat rooms, buddy icons, multiple simultaneous connections to the same network, server-side contact importing, typing notification, direct connection (AIM), proxy support, encrypted messaging (AIM/ICQ), SMS support, and privacy settings. Without stealing your home page and with no other included software, pop-ups, or spyware, Trillian provides unique functionality such as:

  • contact message history,
  • a powerful skinning language,
  • tabbed messaging,
  • global status changes (set all networks away at once),
  • Instant Lookup (automatic Wikipedia integration),
  • contact alerts,
  • an advanced automation system to trigger events based on anything happening in the client,
  • docking,
  • hundreds of emoticons,
  • emotisounds,
  • shell extensions for file transfers, and
  • systray notifications.
WHAT NEWS OF TRILLIAN ASTRA 4.2.0.24
Version 4.2.0.24 adds instant lookup for links, easier retweeting, simultaneous sign-in for Windows Live chat, and an organized history window. Moreover, Legacy users will be pleased to know that Trillian Astra (code for version 4.0 and up) runs lighter than previous versions, and you're less likely to notice system slowdowns because of memory leaks. Video chat gets basic support. The paid upgrade gives you browser-based IM from Trillian.im, full-screen video and filters, many more visual customizations, multiple simultaneous file transfer, and themes, as well as tech support. These features are available for the first 30 days you use the free version, then they deactivate. The biggest changes, besides the reskinned interface, are the long-needed performance improvements and support for a broad range of IM protocols. Longtime fans won't be disappointed with the changes, though those using the free version clearly won't get the full effect of Trillian's more-advanced features. 

INSTRUCTION GUIDES
  1. You need a Windows system requirements which are compatible with Windows XP/7/Vista/2000/2003/XP64/Vista64/Windows7 64 and at least provide 15.97MB empty space beside insternet connection.
  2. Find the download icon below and download by clicking the file, then save it on your folder.
  3. Open the file exe by double click to start installation process.
  4.  The following window will then appear
  5.  Scroll down to read the license agreement and if you agree, click on "Agree". The following window will then appear
  6.  Here you can choose a location to install the program files to. The default location is fine for most users, so simply click on "Next ". The following window will then appear
  7. Now you can optionally choose to install the Ask Toolbar for your web browser. This toolbar can be useful, but do you really need another toolbar cluttering up your browser? If you don't want the toolbar, make sure to deselect the tick/check box at the bottom of the window labelled "I accept the license agreement and want to install the free Ask Tookbar" before clicking on "Next". The following window will then appear
  8. There will be a short pause while files are copied and configured. When this process is complete, the following window will appear
  9. Installation is now complete, you can click on "Launch" and Trillian Astra will start. You should now proceed directly to our next tutorial.  Watch Video Installation

Source: www.trillian.im

Saturday, January 29, 2011

Get Update google Desktop 5.9.1005.12335


Google Desktop makes searching your computer as easy as searching the web with Google. It's a desktop search application that provides full text search over your email, files, music, photos, chats, Gmail, web pages that you've viewed, and more. By making your computer searchable, Desktop puts your information easily within your reach and frees you from having to manually organize your files, emails and bookmarks. Google Desktop doesn't just help you search your computer; it also helps you gather new information from the web and stay organized with gadgets and sidebar. Google Gadgets can be placed anywhere on your desktop to show you new email, weather, photos, personalized news, and more. Sidebar is a vertical bar on your desktop that helps you keep your gadgets organized.

Other features include:
  • Quick search box
  • Smart indexing
  • Multiple file types
  • Find deleted files
  • Deskbar and floating deskbar
  • Lock search
  • Microsoft Outlook integration

WHAT NEW OF GOOGLE DESKTOP 5.9.1005.12335
 
The latest version of Google Desktop offers several new features:

- Google Gadgets: These new interactive mini-applications can be anything from games to search tools to media players, and you can also build your own. You can also configure certain gadgets to back up your gadget content and settings on Google Desktop's servers to protect your information. Saving your information in this manner also allows you to access it from your other computers by logging into your Google Account with Google Desktop. 

- Improved indexing: When you move files, Google Desktop now updates your index more quickly and accurately. With the new “Re-Index” feature, you can also manually re-index your computer.

- Google Talk integration – With Google Talk, you can now send interesting emails, news clips, maps, weather, and stock information from your Sidebar to your friend's Sidebar, chat window, or email inbox using Google Talk. 

- Search Across Computers: Through a secure login, you'll now have the ability to search your Google Desktop index from other computers. This feature will allow you to search your home computer from your work computer, for example. 

- Advanced Search Page: Our new Advanced Search page will now allow you to limit your search to emails, web history, chats, files, folders, and other Outlook features. You can also set a date range for your searches.


INSTRUCTION GUIDES
  1. It is actually easy way to do an installation process, the first thing you need to do is to follow system requirement like using windows Vista/7/XP/2000/2003/XP64 as well as 1.92MB empty space.
  2. Download the Google Desktop file exe and save it (find the download icon below).
  3. Click Install Google Desktop. A prompt will ask whether you want to save the GoogleDesktopSetup.exe file. Save the file.
  4. After saving the file, click on the executable file to install. Click "OK" when prompted with a cautionary warning about executable files.
  5. Read the terms of agreement and click "I Agree" to Google’s Terms of Service to continue.
  6. You will be prompted to select the Google Desktop features. Filename search is selected by default. You have to decide which features you wish to add. You can always change these settings later.
  7. When you have selected the features you want , click "Done"
  8. Google Desktop includes start-up notes to help familiarize you with features and shorcuts, such as pressing CTRL twice brings up the Quick Search Box. Click "OK" to exit the note. 

  9. The installation of Google Desktop is complete. If you chose to install the sidebar, you will see it on the right side of your desktop. You will see gadgets icon in your taskbar and Google Desktop icon in your start-up and desktop. Watch Video installation. To search, either use the search box in the sidebar or bring up the Quick Search Box. You are all set to start searching your personal computer. For more detail how to getting started please refer to here


Source: www.desktop.google.com 

Tuesday, January 25, 2011

Create Fantastic Photo With FastStone Image 4.3


Another good software that you must try is called FastStone Image Viewer is a fast, stable, user-friendly image browser, converter and editor. It has a nice array of features that include image viewing, management, comparison, red-eye removal, emailing, resizing, cropping and color adjustments.  Its innovative but intuitive full-screen mode provides quick access to EXIF information, thumbnail browser and major functionalities via hidden toolbars that pop up when your mouse touches the four edges of the screen.   

Other features include a high quality magnifier and a musical slideshow with 150+ transitional effects, as well as lossless JPEG transitions, drop shadow effects, image annotation, scanner support, histogram and much more. Now, the latest update is FastStone image 4.3 available for free. Watch Video Here
 
WHAT NEW OF FASTSTONE IMAGE 4.3
  • Added Clone Stamp and Healing Brush
  • Added "Auto-Adjust Colors" to Colors menu. THANKS to Andras Horvath
  • Added "Adjust Lighting" to lighten or darken shadows and highlights 
  • Added "Adjust Levels"
  • Added "Adjust Curves"
  • Added USM (Unsharp Mask) option to Sharpen/Blur
  • Added Sketch and Oil Painting effects
  • Added outward-pointing tails to text objects in Draw Board
  • Now images in Slide Show Builder, Multi-page File Builder, Image Strip Builder and Email list can be drag-and-dropped to rearrange the order
  • Supported EPS format by displaying the preview image
  • Updated the RAW format library. Sony SR2 raw format is supported
  • Improved memory management to handle larger images  
INSTRUCTION GUIDES
  1. As usual, you must follow system requirement and for faststone image 4.3 is compatible with all windows versions as well as 5.07MB empthy space.
  2. Now, get the download software by clicking the download icon below and save it into the folder location.
  3. Next, open the FSViewerSetup43.exe by double click, the first window shows wizard installation process, click "Next".
  4. The term of agreement is offered to you, choose "I Accept" (read before you agree).
  5. After that, you can choose the folder location where you want to drop the file (i recommend the default location is the best) click "Next".
  6. The installation program begin, it takes a couple time.
  7. Lastly, when the installing process is completed, click "Finish" (some case you may need to restart your computer) and the software appear automatically on your desktop.


Source: www.faststone.org/

Thursday, January 20, 2011

Download Safari 5.0.3 Get Experience Browser


Currently, web browsers simply got you to the Internet. But from the day it was released, Safari set the bar higher for web browsers. It introduced sophisticated design elements that made browsing a joy. Easy to use, Safari stayed out of your way and let you effortlessly navigate from site to site.  Moreover, Safari is by all means one of the fastest Internet Browsers, and according to the last tests can execute Java scripts up to 40 times faster than IE and up to 3.5 times faster that Firefox. Initially created by Apple for their own Mac OS X platform and later released for Windows, Safari cuts the web page loading time by half. Safari is just Smart, powerful, beautiful browsing on Mac and PC. The New release safari 5.0.3 is available now and some basic features are explained below:

More browsing space: Safari is designed to emphasize the browsing, not the browser. The browser frame is a single pixel wide. You see a scroll bar only when needed. By default, there's no status bar. Instead, a progress indicator turns as your page loads. You'll find tabs at the very top of the browser, opening an even wider window for viewing websites. A great browser, Safari lets you simply enjoy the web.

Find the sites you need: Looking for a site you visited in the past but can't quite remember? Use Full History Search to quickly find sites using even the sketchiest search terms. And when you click a web page in Cover Flow, it's because you've already recognized it as the site you were looking for. No more guessing. Innovative features like these show you how good browsing can be.

Satisfy your need for speed: The world's fastest browser, Safari has speed to burn. Why should you wait for pages to load? You want to see those search results, get the latest news, check current stock prices, right now. Watch Video Safari 5 Tutorial


WHAT NEW OF SAFARI 5.0.3

  • More-accurate Top Hit results in the address field
  • More-accurate results in Top Sites
  • Fixes an issue that could cause content delivered with the Flash 10.1 plug-in to overlap Web page content
  • More reliable pop-up blocking
  • Improved stability when typing into search and text input fields on Netflix and Facebook
  • Improved stability when using JavaScript-intensive extensions
  • Improved stability when using VoiceOver with Safari. Watch video Here
INSTRUCTION GUIDES
  1. Firstly, Safari 5.0.3 is compatible with Windows XP/2003/Vista/7/XP64/Vista64/Windows7 64, choose one of these system requirement and need 34.63MB empty space.
  2. Next, download safari file which is located below article (click the download icon) and save it into folder location.
  3. Find the file exe and Double click on the Safari Setup file to start the installation process.
  4. Click on the "Run" button. This will open up Safari Installer window on your screen.
  5. In the Installer window, Click on the "Next" button.
  6. You will have to agree the license agreement from Safari, so select the "Radio button" that says accept the terms in the license agreement and Click "Next".
  7. In the next step, Click on the "Install" button, it may take a few minute to complete installation.
  8. Finally, click on the "finish". in some case you need to restart your computer first. The following snapshot shows you the Safari home page and ready to be used.

Tuesday, January 18, 2011

Update ImgBurn 2.5.5.0 Availabe


Burn your image now with new update ImgBurn 2.5.5.0. ImgBurn is a freeware created by LIGHTNING UK and a lightweight CD / DVD / HD DVD / Blu-ray image and supports most of the CD writers’ brands.  It offers most of the features seen in many paid programs of the same type and even more. Some of ImgBurn features:
  • Write - It can write most of the image files formats like: BIN / CUE, ISO, IMG, NRG, MDF / MDS, CDI, CDR, DI, DVD, GCM, GI, IBB, IBQ, LST, PDI and UDI;
  • Read - read a disc to an image file as well as supports virtually any audio format like: WAV, FLAC, WV, APE, MP3, MP4/M4A/AAC, WMA, MPC and OGG
  • ImgBurn can burn CD, DVD, HD-DVD and Blu-ray discs
  • ImgBurn can create ISO and IMG image files from files and folders on your hard disk
  • ImgBurn offers an easy interface and simple surface, but offers many additional options for the experienced users as well
  • verify - Check a disc is 100% readable. Optionally, you can also have imgBurn compare it against a given file to ensure the actual data is correct.
  • Discovery - Put your drive/ media to the test, used in combination with DVDinfopro, you can check the quality of the burns your drive is producing.
 WHAT NEW OF IMGBURN 2.5.5.0
  • Added: Support for Plextor PX-870 / PX-880 / PX-L890 drives to be treated as LiteOn drives(rather than true Plextor drives) by the 'Book Type' / 'Advanced Settings' code. This negates the need to manually enter the Device IDs in the 'Configure Drive OEM' window.
  • Added: Support for /NOSAVELOG command line switch (see ReadMe.txt for usage).
  •  Added: Support for /FILESYSTEMONLY command line switch (see ReadMe.txt for usage).
  • Added: Support for relative paths when reading the boot image file name from an IBB file.
  •  Added: Proper support for CDI images (including multi-track/session ones) via Padus's PfcToc.dll file (must be present where ImgBurn.exe is).
  •  Changed: Show a little more firmware version information for LG drives on the Device Capabilities window and when checking for firmware updates. This is useful for drives like the BH10LS30 that display 1.00 when the full version number might actually be 1.00-A9. 
  •  Changed: Increased precision of timestamps when 'building' UDF file system.
  • Changed/Fixed: DLL loading method to avoid Microsoft Security Advisory (2269637).
  • Fixed: An internal table containing file system info during a Read/Verify operation was using an incorrect size value for files when UDF was being used and the files had multiple allocation descriptors spread over multiple sectors. (Only used when logging which file a certain bad sector belongs to)
 INSTRUCTION GUIDES
  1. Follow some system requirements like using one of windows version (in this software include all version), need at least 5.26MB empty space and high internet connection.
  2. Now, find the download icon below, click it and asve into the folder location that you want to save but please remember where you put it.
  3. Next step is Double-click the exe file to start the installer. Welcome to the ImgBurn setup wizard click "Next"
  4. Read, then accept the terms of condition click "Next"
  5. You'll be asked to choose your components. You can change these settings as you like, as the only necessary one is 'Main Program Files' click "Next"
  6. Now you'll be asked for the install location (default foder location is the best choice). click "Next"
  7. Now you'll be asked if you want to automatically check for new versions. You can set this either way. start installing program and wait for amoment.
  8. Finally, you'll get the successful install window. Just click on 'Finish' here to exit the installer
  9. After the installer exits, ImgBurn will automatically appear on your desktop and ready to be used it.


Saturday, January 15, 2011

Powerfull Graphics ATI Catalyst Drivers 10.12 XP


Now, having a powerfull graphic card is needed by users especially for people who like playing game.  AMD's award-winning ATI Catalyst graphics and HD video configuration software delivers unprecedented control of performance and visual quality with ATI Radeon™ graphics processors.

With ATI Catalyst drivers  is delivering stable performance and push the limits of innovation with advanced user-oriented features. Moreover, precision controls for power users.

Tweaks for gamers and video enthusiasts. Simple wizard-assisted setup, easy multi-monitor configuration, and ultra reliable operation for working professionals. New user or seasoned expert, ATI Catalyst puts you in charge of The Ultimate Visual Experience.

Industry-leading performance
  • ATI Catalyst updates are focused on improving graphics performance, including enhancements for popular Direct3D and OpenGL game titles.
Innovative and exciting features
  • ATI Catalyst includes the ATI Catalyst Control Center™, delivering innovative features and unprecedented control of performance and visual quality with ATI Radeon graphics.
Robust stability
  • Catalyst drivers for Windows Vista and Windows XP are Microsoft WHQL-certified to deliver the industry's most stable and reliable graphics performance.

INSTRUCTION GUIDES
  1. Firstly, this version of system requirement is only compatible with Windows XP/2003 (32 bit) and high speed internet connection.
  2. Secondly, find the download logo below article and click it (save to folder location, please remember it).
  3. Once the download process is finished, a prompt with a security warning by Microsoft windows vista will show up asking if you wish to run the file. Click "Run" to start the install process.
  4. A window will appear with the End User License Agreement.  Click on the "Accept" button after agreeing to the license.  Click "Next" to proceed.
  5. Next, a window will open and prompt with a destination folder indicating where the installation files will be saved to.  Use the default folder or change the location by clicking the "Browse" button. Click the "Install" button to proceed.
  6. Under start Catalyst Install Manager, choose languagethen click "Next"
  7. Select Express or Custom Installation and also choose where you want to locate the installation program (default is better) then click "Next". 
  8. On the next window, a prompt will appear to specify the folder for installation.  
  9.  In the next Step the system will be analyzed
  10. On the next window customize the installation by un-checking the unneeded components. Click "Next"
  11. The installation procedure will start shortly thereafter and a dialog box will indicate the install progress. 
  12. Click Finish to complete the installation process and restart the system when prompted.Click "Finish"
  13. The installation process will be completed once the computer has restarted. Watch video here . Good Luck


    Source: http://support.amd.com

    Friday, January 14, 2011

    Update Your Skype 5.1.0.104


    Today, update Skype launced a new version 5.1.0.104 to offer many advantages such as excellent sound quality secure with end-to-end encryption, instant messaging, file transfer and video conferencing ect. Skype is software for calling other people on their computers or phones. Download Skype and start calling for free all over the world. The calls have excellent sound quality and are highly secure with end-to-end encryption. You don't even need to configure your firewall or router or any other networking gear. On the other hand, the best things from Skype may come from the system that the Skype company does not run servers, but makes use of background processing on computers running Skype software-the original name proposed, Sky peer-to-peer so that it is quite different from others VoIP. Moreover, you may do not need to configure your firewall or router or any other networking gear.

    In addition to polishing Skype, we have made the following improvements in Skype 5.1 for Windows:

    * Video calls now start by default in 640x480 resolution
    The video quality at the start of the call will be higher for some users now as previously only selected cameras were allowed to start in this resolution. The video resolution is controlled and adjusted during the call based on network conditions. Users with fast computers and specific webcams can experience video calls in up to 720p.

    * Video calls on powerful computers start in 30 frames per second
    From the start of the call, you are able to experience a video which is on a par with TV broadcast quality. Users with slower computers will start with video calls in 15 frames a second and will gradually be improved if the network conditions allow it.

    * Improved surfacing of 'Add Contact' and 'Create a Group' functions
    We have increased the functionality of the conversations panel by adding the ability to 'Add Contact', and create a group for a Group Video Call or group Instant Messaging.


    INSTRUCTION GUIDES

    Additionally, it does not just work on Windows. Skype is also for Mac OS X, Linux. for people who are using Linux, Mac OS X can refer to Here for detail instruction guides.

    Firstly, for Windows system, you must fulfill several technical support below:
    • PC running Windows 2000, XP, Vista or 7, both 32- and 64-bit operating systems. (Windows 2000 users require DirectX 9.0 for video calls).
    • Internet connection-broadband is best (GPRS is not supported for voice calls).
    • Speakers and microphone-built-in or separate.
    • For voice and video calls we recommend a computer with at least a 1GHz processor, 256 MB RAM and of course a webcam.
    • For best quality on group video beta calls, we recommend that calls include up to five people.
    • For group video calling everyone on the call needs Skype 5.0 for windows plus a webcam. You will also need a high-speed broadband connection (we recommend sustained 512 kbit/s downlink or more) and a computer with GHz processor (minimum) or Core 2 Duo 1.8 GHz (recommended).

    Source: www.skype.com

    Thursday, January 6, 2011

    Create Your photo With Picasa 3.8 build 117.29


    Having all your photos in one place means no more time wasted searching for folders or files. Now the software called Picasa has been released new version 3.8 build 117.29, and it is absolutely freeware to be downloaded. basically, Picasa is software that helps you instantly find, edit and share all the pictures on your PC. Every time you open Picasa, it automatically locates all your pictures (even ones you forgot you had) and sorts them into visual albums organized by date with folder names you will recognize. You can drag and drop to arrange your albums and make labels to create new groups. Picasa makes sure your pictures are always organized. Picasa also makes advanced editing simple by putting one-click fixes and powerful effects at your fingertips. And Picasa makes it a snap to share your pictures, you can email, print photos home, make gift CDs, instantly share your images and albums, and even post pictures on your own blog. Moreover, The program works with JPEG, GIF, BMP, PSD and movie files and is compatible with most digital cameras as well as able to detects your USB driver and imports pictures into albums.

    WHAT NEW OF PICASA 3.8 BUILD 117.29
    The latest version includes Web Albums (along with other improvements), but requires that you request an account from Google. Some of others improvement are below:

    · Fixed screensaver issues with cropped pictures and captions not displaying.
    · Fixed Broken EXIF rotation and zoom in Photo Viewer.
    · Fixed problems upgrading facetags from 3.6 and several other issues with cropped/rotated  files.
    · Fixed importing from scanners issue in Windows 7.
    · Create a Face Movie from a selection of photos in the tray (instead of using the entire Person Album).
    · Original file jpeg quality preserved when saving from Picnik.
    · Color Management is now turned off by Default.
    · Increased stability through multiple crash fixes.

    INSTRUCTION GUIDES
    1. Follow system requirements like windows XP/ 2003/ Vista/ Windows 7/ XP64/ Vista64/ Windows7 74Download and also require 13.60MB file size insted of high internet connection.
    2. Find the download icon below and click it to get download (remember where the file location you have saved), next step, double-click the executable file, which ends in '.exe'.
    3. You'll be prompted to accept the terms of agreement. Click I Agree.
    4. The 'Picasa Setup' dialog should appear. Choose a location on your computer where you'd like to save the application and click Next.
    5. Click Finish to complete the installation.
    6. The Picasa setup will then launch and prompt you to specify the folders for the initial scan. Picasa will display these photos without moving the files from their existing location.
    7. Last but not least, you'll be offer the choice of using Picasa Photo Viewer on your computer. The Picasa Photo Viewer is standalone photo viewer that lets you quickly preview photos on your computer. Watch Video installation process . Good Luck

    Tuesday, January 4, 2011

    Back Up Physical CD/DVD/HD-DVD With Daemon Tool Lite 4.35.6

    "Affraid to be lost of your important data or files on CD" now, the present of software like DAEMON tool lite 4.35.6 will help you relating to data back up. With DAEMON Tools you can definitely back up your physical CD/DVD/HD DVD/Blu-ray discs into "virtual discs" or so called "disc image" files, which run directly on your hard drive. You can also work with images created by other burning programs! DAEMON Tools supports variety of image types. Use CD/DVD image converter to have one format images in your Image Catalog.


    Two basic the best tools are:

    1. Emulate virtual CD/DVD-ROM/HD DVD and Blu-ray drives
    DAEMON Tools Lite [Commercial] enables you to emulate up to 4 CD/DVD virtual drives on your PC. Virtual drives will appear in your OS just like real ones. Select a virtual drive then choose a disc image you want to mount. Find the created virtual drive with mounted disc image in My Computer. Start working! Looks like working with a real drive and a real disc, doesn't it? Yes, but it is much faster!

    2. Create a disc image
    With DAEMON Tools Lite [Commercial] you can create ISO and MDS image files from original discs inserted in physical CD/DVD/HD DVD/Blu-ray drives. Or use images you have created earlier with other program. DAEMON Tools products work with variety of image types.

    Moreover, some of other Key features include:
    • creates *.iso and *.mds images;
    • emulates up to 4 virtual CD/DVD drives;
    • performs image mounting and unmounting;
    • supports *.b5t, *.b6t, *.bwt, *.ccd, *.cdi, *.cue, *.nrg, *.pdi, *.isz;
    • offers powerful command line interface.
    WHAT NEW OF DAEMON TOOLS LITE 4.35.6
    • New MDX (Media Data eXtended) format supporting
    • DAEMON Tools Windows Sidebar gadget skin selection
    • Drag'n'drop support in Windows Sidebar gadget
    • Added "Open Mount'n'Drive Manager on start" option
    • Added "-help" command line switch.

    INSTRUCTION GUIDES

    1. First, make sure you use one of system requirements like Windows 2000/XP/2003/Vista/7/ XP64/ Vista 64/ windows7 64 and prepare 9.15MB empty space instead of high speed internet connection.
    2. Second, Scroll down and you will find the download icon, click it and save it (remember the folder you have been saved). After the download is completed, Double-Click the file to begin setup wizard.
    3. Select a language that you like click "OK". On welcome to DAEMON Tool Lite 4.35.6 setup wizard, click "Next".
    4. Read the License of Ageement, then click "I Accept". If you see the message “Setup must restart Windows and continue installation after reboot. Would you like to restart now?”, click "OK" to restart Windows.
    5. On Choose Components, select the components that you are willing to install. You also can unchecked Browser Toolbar if you don’t want it on your browser. Click "Next" to continue.
    6. On Support the DAEMON Tools Team, you can choose to set default start page of your browser to DAEMON Search. Unchecked Browser’s Start Page if you don’t want to. Then, click "Next".
    7. Next window, select which folder location you want to install DAEMON Tools Lite. Click "Install" to begin the installation.
    8. After the installation process is completed, keep the check box Run DAEMON Tools Lite and click "Finish".
    9. Daemon Tools Lite is updating virtual devices on the computer. Lastly, Installation is finished, you will see the icon of Daemon Tools Lite on notification area. Watch Daemon Tool review


    Source: www.daemon-tools.cc

    Sunday, January 2, 2011

    Protect PC With Comodo Internet Security 5.0.163562.1142

    Another internet security that you may consider is called Comodo Internet Security 2011 which is the free, multi-layered, security application that offers complete protection from viruses, Trojans, worms, buffer overflows, zero-day attacks, spyware and hackers. Moreover, Comodo claim that their firewall is unique in that it passes all known leak tests to ensure the integrity of data entering and exiting your system. Comodo has put firewall through all kinds of sophisticated tests to ensure its firewall powerful enough to ward off these attacks with default settings. No other firewall has had to work this hard.Watch Comodo internet security review
    • PC Magazine Online's Editor's Choice
    • Secures against internal and external attacks
    • Blocks internet access to malicious Trojan programs
    • Safeguards your Personal data against theft
    • Delivers total end-point security for Personal Computers and Networks
    WHAT NEW OF COMODO INTERNET SECURITY 5.0.163562.1142

    Resource management is better than before, with hogging all but eliminated. It provides a smorgasbord of information and options for advanced users, but it's simple enough for beginners, and runs smoothly and silently in the background. In addition, both new features and fixed are shown below:
    • NEW! Full IPv6 Support in firewall
    • NEW! Rootkit Scanner - Hidden registry keys, files and folders are detected
    • NEW! 5 skins from COMODO, including a native windows skin
    • IMPROVED! AV database updating - Virus DB size reduced significantly
    • IMPROVED! AV engine - fixed some bugs and added new detection mechanisms
    • IMPROVED! Cloud scanning is enabled by default in manual scanner now
    • IMPROVED! Installer - It now enables/disables windows firewall/defender during the installation/uninstallation
    • FIXED! CIS causes massive amount of entries in windows security audit logs
    • FIXED! AV does not validate the revocation status of the certificates in signed binaries
    • FIXED! BSOD in cmderd.sys
    The latest version sees a major leap forward in security and usability with the addition of cloud based virus-scanning and behavior analysis of unrecognized files - making CIS 2011 unbeatable at detecting zero-day attacks.Watch Video prevention test

    INSTRUCTION GUIDES
    1. Firstly, Comodo internet security is required Windows system like Windows XP/2003/Vista/7 as well as need file size about 33.56MB.
    2. Find the download icon below, then click and save it on the folder (remember the folder location where you save it).
    3. When the download is completed, Double click to start installation process. the prompt window appear  to show the installation wizard starts automatically and the select the language dialog is displayed, select the language in which you want Comodo Internet Security to be installed from drop-down menu and click "OK".
    4. Next step, the End-User License Agreement dialog box will be displayed. Please read and then click "I Accept" to continue.
    5. Select the products you would like to install, there have two are install Comodo firewall and install Comodo Antivirus (in order to obtain maximum protection, you uninstall any third party personal firewall and antivirus in your system and select both the Comodo antivirus and Comodo firewall options) click "Next".
    6. the setup will extract files requires for installing the selected components click "Next". After that the next screen allows you to select the folder in your hard drive for installing Comodo Internet Security (The default part is recommended) click "Next" to continue. 
    7. Configuring your DNS setting which provide two choice "I would like to use Comodo secure DNS servers" or " I do not want to use Comodo secure DNS servers" (Comodo's Secure DNS ensures safety against attacks in the form of malware, spyware, phishing etc., by blocking access to malware-hosting sites, by any program running in your system) click "Next".
    8. After completing the configuration options to your satisfaction the setup wizard will ask for configuration before commencing the installation procedure click "Install" (wait for a minute). 
    9. The last step, the installation is completed and click "Finish". Now, your computer need to be restarted. Good Luck.


    Source: www.personalfirewall.comodo.com


    Related Posts Plugin for WordPress, Blogger...

    BlogCatalog